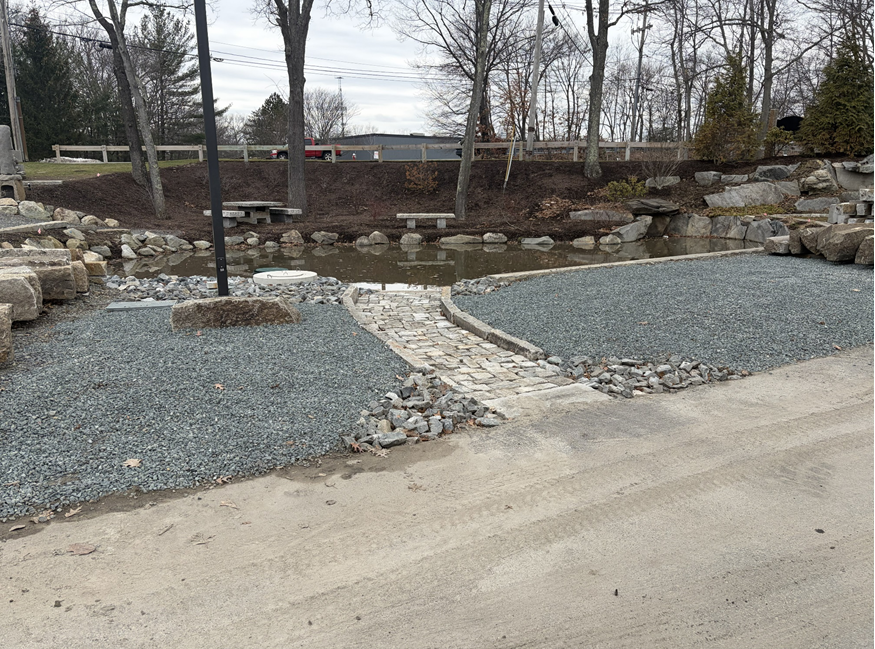
A functional and esthetic swale to correct a drainage problem
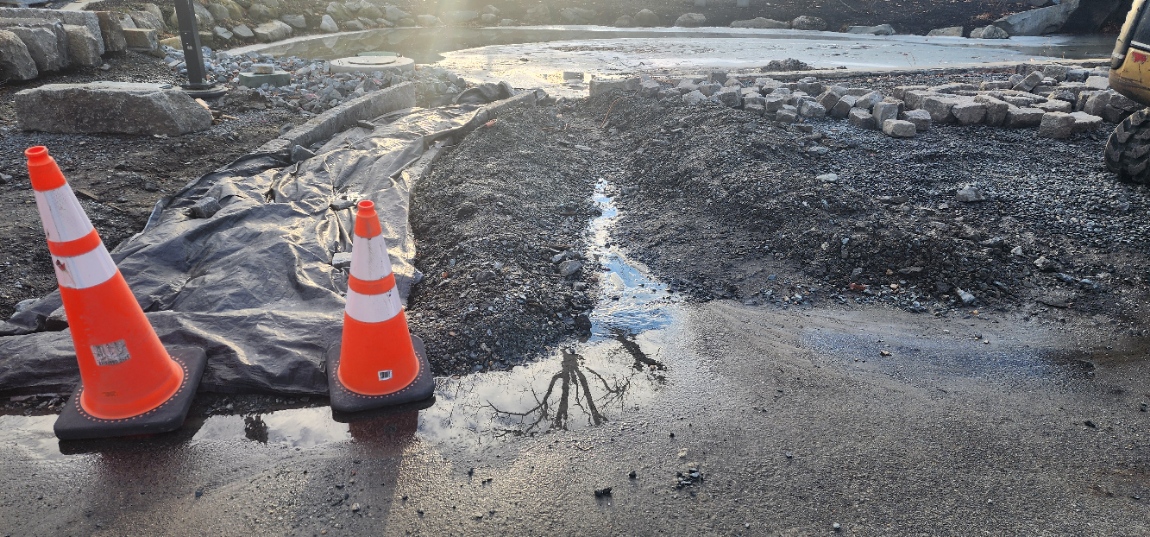
The “Ponding” in our front roadway loop had become a problem. The original terrain is such that most of the front of our yard is graded to allow flow of water down to our man-made detention pond. Four-inch minus (blue blasted stone) had originally been laid out along the roadway in front of the pond to serve as a filter for runoff water. Over time, though, this stone had become clogged with sediment causing a dam effect and resulting in poor drainage and a roadway edge “pond.”
Solution:
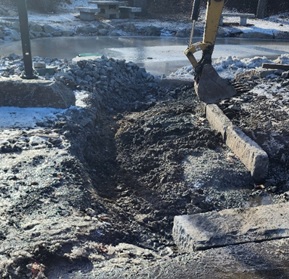
Other than some drastic grade changes, solutions were limited. Our first thought was to install a drain chamber with a surface grate. But this would present problems. For one it would require a “deep dig” and hence, much disruption – there are electrical conduits in the area posing a significant obstacle. Also, with a “catch basin” of sorts there would always be the need for continued cleaning to remove sediment.
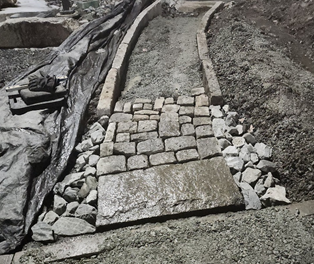
Constructing a cobblestone swale with a 6” drop would provide adequate flow, can be easily cleaned, looks good, is relatively inexpensive … and it is a project that could be done in the winter with the use of “frost” blankets.
The Preparation:
• Inspect the area, mark the low point.
• It may be necessary to plan for an adjacent “temporary” swale (as we did) where runoff water can be diverted during construction.
The Sitework:
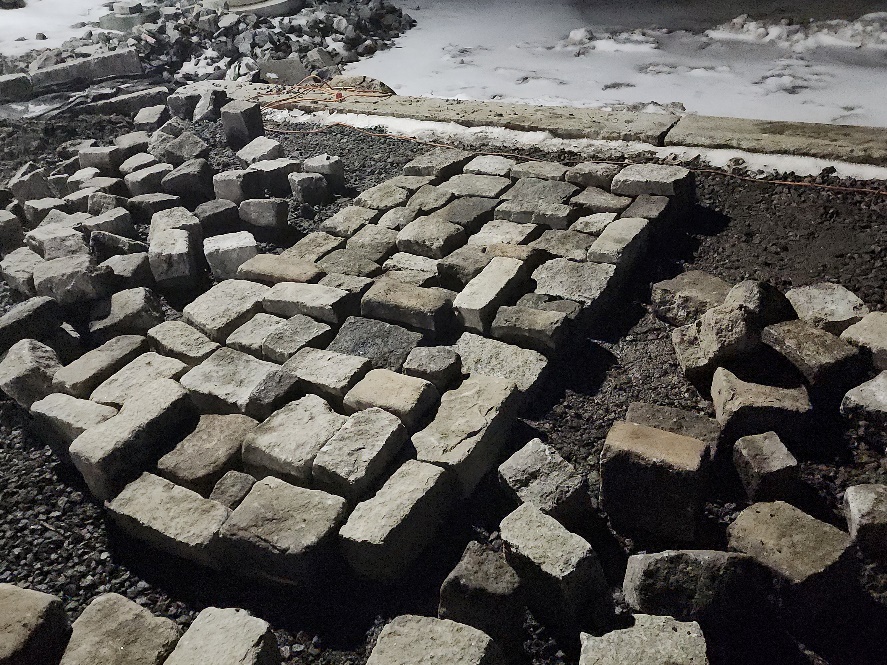
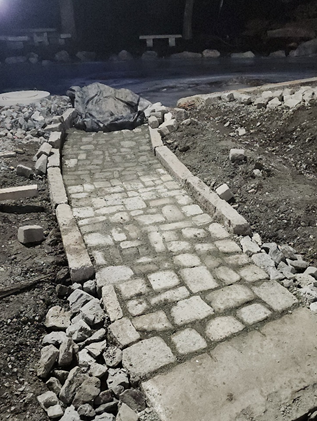
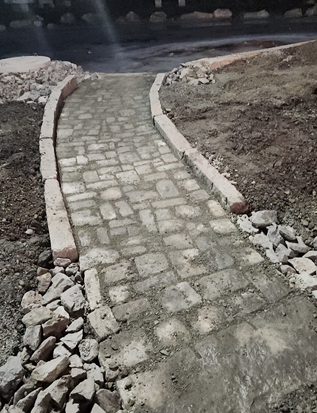
• Clear the area and determine the course of the swale. In our instance, a slight curvature worked best – this can be accomplished nicely
By using short 40” slope curb pieces as edges and a surface of random size Olde New England Granite cobblestones.
• Use a laser level to set the desired grade of the first edge, then the opposing edge can be set accordingly with a long level.
• The laser level also helped us set the grade of the lower “platform” granite considering the overall pitch of 6”.
The Process
• Maybe start by separating the stones by size (5-6 groups) – large squares, cubes, small rectangles, large rectangles, etc., this will make it easier to see the sizes and make selections.
• Then select a basic format or pattern for your “mixed” stones.
• Lay out a small mockup – it will help determine your basic pattern and how your “mixed cobbles” can best be used.
Getting started:
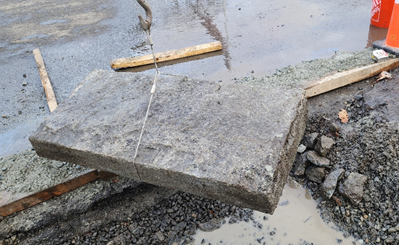
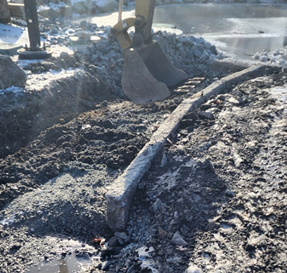
Excavate for the bed. If you are using a granite “threshold” piece, as we did, it will have to be set first. This will dictate the position of the side walls.
Setting the top threshold using a braided wire. A cutting wheel can be used to cut the wire after the granite piece is in position.
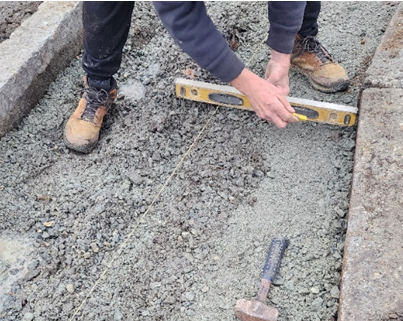
Set one side wall at grade
then with a long level, set the opposite edge accordingly.
• Tamp, compact, and grade bed as necessary.
• Set up a string line top to bottom at the desired pitch.
• With a short level, transfer and mark the grade at intervals on the edge granite.
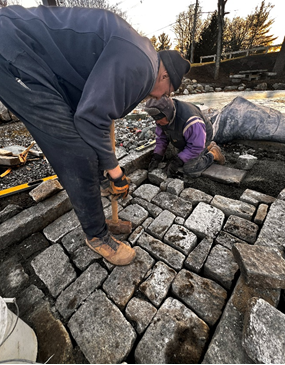
Setting the stones
It’s always a good idea to have a person with spatial relations skills “on top” in support and picking stones … and an accomplished “detail person” on the ground setting the cobbles in place
• A good road pack gravel works well to give a proper base.
• Set some stones, prepare the next section, and keep checking the grade.
• Use a small sledge and a large sledge to tap stones into position.
• With levels, continuously check the edge mark to stay on the desired grade.

• When closing in on the final stones at the bottom of the grade, double check the grade so there is no chance of “ponding” at the end.
• After the bed had been set, check for “ups and downs” adjust as necessary.
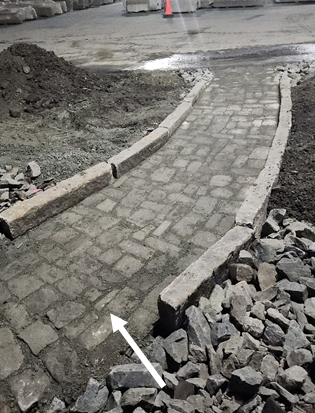
• After checking the surface, sweep in stone dust to fill all the spaces.
5” minus blasted rock at the 4 corners will allow for additional drainage
The completed swale